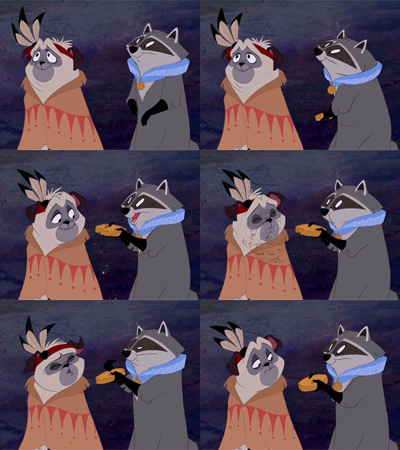
Thursday, January 26, 2017

Class 1 1/25/2017

Hey guys! Welcome to the class blog. This entry covers what we talked about during the first class. I have the principles of animation here, and then below some resources on maya animating and the graph editor. This is here for you to review. The assignment is at the very bottom.


1) Principles of Animation
1. SQUASH AND STRETCH
This action gives the illusion of weight and volume to a character as it moves. Also squash and stretch is useful in animating dialogue and doing facial expressions. How extreme the use of squash and stretch is, depends on what is required in animating the scene. Usually it's broader in a short style of picture and subtler in a feature. It is used in all forms of character animation from a bouncing ball to the body weight of a person walking. This is the most important element you will be required to master and will be used often.


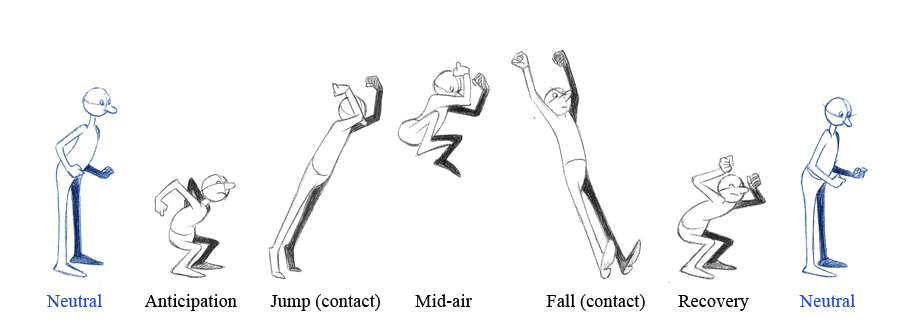
2. ANTICIPATION
This movement prepares the audience for a major action the character is about to perform, such as, starting to run, jump or change expression. A dancer does not just leap off the floor. A backwards motion occurs before the forward action is executed. The backward motion is the anticipation. A comic effect can be done by not using anticipation after a series of gags that used anticipation. Almost all real action has major or minor anticipation such as a pitcher's wind-up or a golfers' back swing. Feature animation is often less broad than short animation unless a scene requires it to develop a characters personality.


3. STAGING
A pose or action should clearly communicate to the audience the attitude, mood, reaction or idea of the character as it relates to the story and continuity of the story line. The effective use of long, medium, or close up shots, as well as camera angles also helps in telling the story. There is a limited amount of time in a film, so each sequence, scene and frame of film must relate to the overall story. Do not confuse the audience with too many actions at once. Use one action clearly stated to get the idea across, unless you are animating a scene that is to depict clutter and confusion. Staging directs the audience's attention to the story or idea being told. Care must be taken in background design so it isn't obscuring the animation or competing with it due to excess detail behind the animation. Background and animation should work together as a pictorial unit in a scene.


4. STRAIGHT AHEAD AND POSE TO POSE ANIMATION
Straight ahead animation starts at the first drawing and works drawing to drawing to the end of a scene. You can lose size, volume, and proportions with this method, but it does have spontaneity and freshness. Fast, wild action scenes are done this way. Pose to Pose is more planned out and charted with key drawings done at intervals throughout the scene. Size, volumes, and proportions are controlled better this way, as is the action. The lead animator will turn charting and keys over to his assistant. An assistant can be better used with this method so that the animator doesn't have to draw every drawing in a scene. An animator can do more scenes this way and concentrate on the planning of the animation. Many scenes use a bit of both methods of animation.


5. FOLLOW THROUGH AND OVERLAPPING ACTION
When the main body of the character stops all other parts continue to catch up to the main mass of the character, such as arms, long hair, clothing, coat tails or a dress, floppy ears or a long tail (these follow the path of action). Nothing stops all at once. This is follow through. Overlapping action is when the character changes direction while his clothes or hair continues forward. The character is going in a new direction, to be followed, a number of frames later, by his clothes in the new direction. "DRAG," in animation, for example, would be when Goofy starts to run, but his head, ears, upper body, and clothes do not keep up with his legs. In features, this type of action is done more subtly. Example: When Snow White starts to dance, her dress does not begin to move with her immediately but catches up a few frames later. Long hair and animal tail will also be handled in the same manner. Timing becomes critical to the effectiveness of drag and the overlapping action.


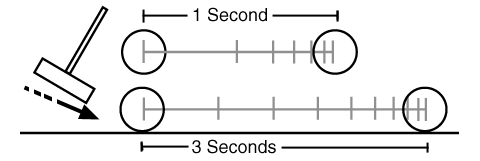
6. SLOW-OUT AND SLOW-IN
As action starts, we have more drawings near the starting pose, one or two in the middle, and more drawings near the next pose. Fewer drawings make the action faster and more drawings make the action slower. Slow-ins and slow-outs soften the action, making it more life-like. For a gag action, we may omit some slow-out or slow-ins for shock appeal or the surprise element. This will give more snap to the scene. 


7. ARCS
All actions, with few exceptions (such as the animation of a mechanical device), follow an arc or slightly circular path. This is especially true of the human figure and the action of animals. Arcs give animation a more natural action and better flow. Think of natural movements in the terms of a pendulum swinging. All arm movement, head turns and even eye movements are executed on an arcs.


8. SECONDARY ACTION
This action adds to and enriches the main action and adds more dimension to the character animation, supplementing and/or re-enforcing the main action. Example: A character is angrily walking toward another character. The walk is forceful, aggressive, and forward leaning. The leg action is just short of a stomping walk. The secondary action is a few strong gestures of the arms working with the walk. Also, the possibility of dialogue being delivered at the same time with tilts and turns of the head to accentuate the walk and dialogue, but not so much as to distract from the walk action. All of these actions should work together in support of one another. Think of the walk as the primary action and arm swings, head bounce and all other actions of the body as secondary or supporting action.


9. TIMING
Expertise in timing comes best with experience and personal experimentation, using the trial and error method in refining technique. The basics are: more drawings between poses slow and smooth the action. Fewer drawings make the action faster and crisper. A variety of slow and fast timing within a scene adds texture and interest to the movement. Most animation is done on twos (one drawing photographed on two frames of film) or on ones (one drawing photographed on each frame of film). Twos are used most of the time, and ones are used during camera moves such as trucks, pans and occasionally for subtle and quick dialogue animation. Also, there is timing in the acting of a character to establish mood, emotion, and reaction to another character or to a situation. Studying movement of actors and performers on stage and in films is useful when animating human or animal characters. This frame by frame examination of film footage will aid you in understanding timing for animation. This is a great way to learn from the others.


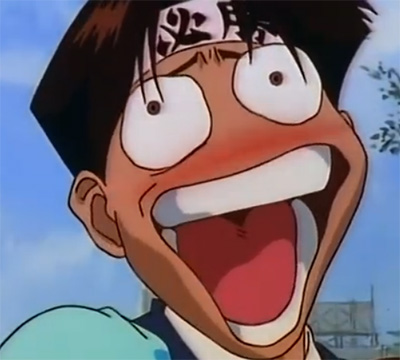
10. EXAGGERATION
Exaggeration is not extreme distortion of a drawing or extremely broad, violent action all the time. Its like a caricature of facial features, expressions, poses, attitudes and actions. Action traced from live action film can be accurate, but stiff and mechanical. In feature animation, a character must move more broadly to look natural. The same is true of facial expressions, but the action should not be as broad as in a short cartoon style. Exaggeration in a walk or an eye movement or even a head turn will give your film more appeal. Use good taste and common sense to keep from becoming too theatrical and excessively animated.


11. SOLID DRAWING
The basic principles of drawing form, weight, volume solidity and the illusion of three dimension apply to animation as it does to academic drawing. The way you draw cartoons, you draw in the classical sense, using pencil sketches and drawings for reproduction of life. You transform these into color and movement giving the characters the illusion of three-and four-dimensional life. Three dimensional is movement in space. The fourth dimension is movement in time.


12. APPEAL
A live performer has charisma. An animated character has appeal. Appealing animation does not mean just being cute and cuddly. All characters have to have appeal whether they are heroic, villainous, comic or cute. Appeal, as you will use it, includes an easy to read design, clear drawing, and personality development that will capture and involve the audience's interest. Early cartoons were basically a series of gags strung together on a main theme. Over the years, the artists have learned that to produce a feature there was a need for story continuity, character development and a higher quality of artwork throughout the entire production. Like all forms of story telling, the feature has to appeal to the mind as well as to the eye.


(This can be the major theme of this class)


2) Maya Animation

Below I will add some maya hotkeys and a link to info about the Graph Editor.  I will also list the topics I talked about in class.  I won't go into to detail, but I will list them so you can google them or research them on youtube to gain more information.

Maya
  Alt Left Mouse rotates view
  Alt Middle Mouse pans the view
  Alt Left + Middle Mouse zooms in and out
  Create Shape (Sphere, Box, Plane, etc)
  X Y Z 
  Translate Rotate Scale
    - and + to change manipulator size
  Channel editor and their values
  Perp and orthographic window view
    Space bar switches between them

Shading
  Right Click, assign new material
  Shaders (Lambert, Blinn, Phong, etc)
  Change Color in shader attribute editor

Maya Windows we will use
  Graph Editor
    Shows animation curve
  Outliner
  Attribute Editor
    Ctrl+A

Animation
  S for setting KeyFrames
  Time slider
  Range Slider
  Moving Keyframes to change timing
  Keyframe tangents
    Spline, Flat, Linear, Stepped
    Unified and broken tangents


Maya 2016 Hot Keys:  Some of these I did not show in class, but will talk about later on.


Animation Operations
s
Animate > Set Key
i
Insert Keys Tool (for Graph Editor) (press and release)
Shift
S
With left mouse button for Keyframe marking menu
Shift
S
With middle mouse button for Tangent marking menu
Shift
E
Set key for Rotate
Shift
R
Set key for Scale
Shift
W
Set key for Translate
Alt
j
Toggle Multicolor Feedback
Playback Control
Alt
.
Move forward one frame in time
Alt
,
Move backward one frame in time
.
Go to Next key
,
Go to Previous key
Alt
v
Turn Playback on or off
Alt+Shift
V
Go to Min Frame
k
With middle mouse button for virtual Time Slider mode (press and hold and scrub timeline)


LINK:Maya Graph Editor Reference


3) Youtube Tutorials

Please please I urge you to watch these videos when you can.  I realize they are long, but if you can sit through these, they will benefit you greatly for this class.  


Youtube Tutorial Playlists

Maya for Beginners : Animation Mechanics and tips In Maya


Maya for Beginners: Principles of Animation


**ASSIGNMENT!!**

-Pick a video from the link below and draw 10 poses from the life drawing videos


Inspirational Quote:

“Every artist has thousands of bad drawings in them and the only way to get rid of them is to draw them out.”

-Read “Time to Draw” in The Animators Survival Kit.  pg. 23

Saturday, December 3, 2016

Class 13 11/29/2016

Links to topics covered in class.

Carlos Baena and Blinking

Highlighted Text About Blinking

"The exact moment we blink is being shosen unconscious, but so as to not interrupt the perception of valuable visual information. That is after we looked in one direction for a while and get "enough" information from that, we blink and change focus of interest. By analogy, sometimes we blink to separate one thought from another in a thought process."


"When a thought process is finished or a decision is made - I once
heard a film editor say that he likes to cut on blinks because blinks
signal completion of whatever is going on in a character's mind"

"another place I like to use a blink occasionally is when lip syncing the "P" sound,"

"This is what I thought was interesting. Someone here told me about a book (sorry - can't remember the title right now) where a film editor discussed how he edits his movies. Basically, he makes the cut where an actor blinks or when
the viewer naturally "feels" like it's time to blink. His whole theory is that our brain is viewing a film whenever we are awake and that our eyes are the editors, and the blinks are our eyes "cutting" the "scenes." This is why we blink when our though process changes or eye direction changes,"

"offset the blinks but the actual closure of the eyes occurs on the same frame."

"Other stuff I try to do is to actually anticipate eyeblinks over a frame or two. Not that is very noticeable, but when you have closeups I really think it makes a difference. When we dart our eyes, the pupil eases out...I also noticed that with blinks. The eyelid doesn't close in a constant way, we have slows in and out of the open/close move"


Eye Brows

Animation as Visual Music

Body Shapes and Lines

Homework

Bring in SPLINED animations!!  Also send me your maya files as well, in case I need to open it in class and demonstrate anything.

Wednesday, November 9, 2016

Class 12 11/09/2016

Notes from class last night

Characters holding objects
I talk about parent constraining a prop to your character's hand.

Props are usually rigged under Control Curves.  I usually use about 3, but you can make due with 2 or 2. 

Make sure the geo is parented to the lowest curve in the hierarchy.
Make a group null and put the top Control Curve under that group null.  That Group null you may call buffer, and use that to parent constrain to your animation wrist control.

The hierarchy will look something like this.

PropMasterGRP>PropBufferGRP>PropMasterCTRL>PropCTRL02>PropCTRL03>PropGEO

It is good practice to create your prop rig in a separate file and reference it in.

I used add attribute on the top rig control to create a custom attribute for toggling visibility.

I then used set driven key to connect the attribute to the visibility of the geo.  Please google set driven key for tutorials if you want to be refreshed on the concept.


Throwing objects

When I throw objects, I would rather toggle the visibility of multiple objects than trying to keyframe the parent constraint.  Usually I do this by referencing a prop twice, and parent constraining only one to the hand.

Creating shot folder hierarchy
Once your layout is all set, break up your maya scene into separate files.
Animate in those separate files and render from them.
Edit those clips in after effects.

Videos about cameras and character placement:


HOMEWORK

Once your layout is in a good place, begin animation blocking.  Break up your maya layout scene into separate shots and add more detail to your poses, animation blocking and timing.  Bring in your updated edit next week, so we can critique your progress.

Tuesday, October 25, 2016

Class 10 10/25/2016

In today's class, I outlined what I would like to see in your final assignments.  I showed more examples of Animation planning, and some videos that will hopefully inspire your ideas.  You will have the rest of the semester to work on your final, with it being due on the last day of class.  Each week's assignment will be to work on various aspects of the animation process.

Animator Acting reference:
http://i.imgur.com/UWmcpFk.gifv
http://i.imgur.com/mK9ZmYP.gifv

Animation using real baseball game as reference.
https://i.imgur.com/cNjgPH1.gifv

Every Frame a Painting. 
These videos give some ideas and knowledge about how you can use the camera to enhance the actions you are trying to show.  Remember, you do not have to be as elaborate as some of the examples shown here.  I just would like you to see all the possibilities that are available within the frame of the camera.

Drive (2011) - The Quadrant System from Tony Zhou on Vimeo.
Wolf Children (2012) - The Lateral Tracking Shot from Tony Zhou on Vimeo.
Edgar Wright - How to Do Visual Comedy from Tony Zhou on Vimeo.

Some really dumb, but well done animations.

Animator Progression reels:

The last two videos for Ratatoullie, and Monsters Inc, I want you to pay attention to.  These two videos show very well many of the steps I would like you to do for your final.

Another source of inspiration might be the Frame X Frame Tumblr.  Surf this website, and see if there are any animations or actions that interest you.

Mr. Buttons
I've shown this animation before in class, but I will be happy to link you to it again, since it is a nice clip that meets the requirements of the final project.

Blind Date Animation (right click, save as)

You may use the Mr. Buttons free rig if you like, but I would not suggest it for lip synch animation.

HOMEWORK

1) Finish your lip synch animations. 

2) Final Project Phase 1:
-Please come up with at least two animation ideas.  It could be anything from a lip synch animation like the 11 Second Club, to an action, like dancing or fight choreography.
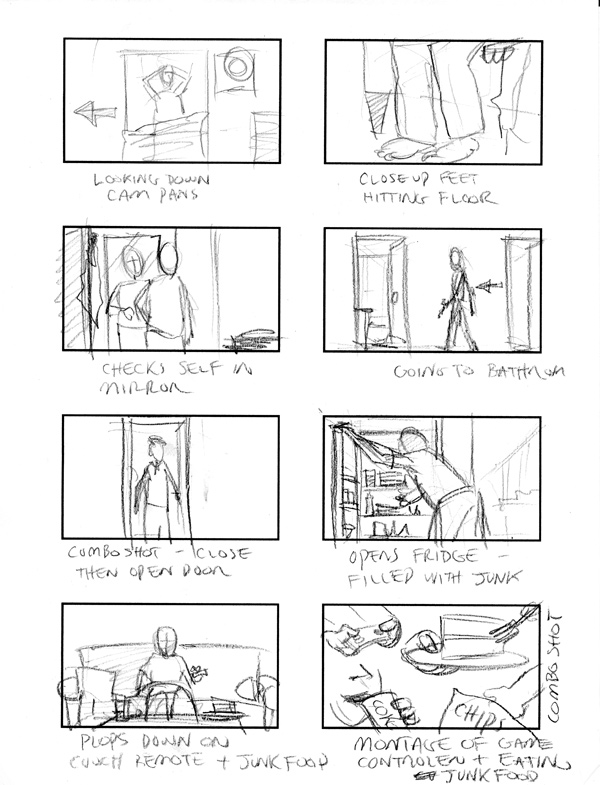
-Sketch out thumbnails of how you would animate these ideas.  If you are not sure what thumbnail sketches are, here are some examples:

-Essentially, the idea is to sketch out the most important points of your story, or action.  Bring in these images and present your idea for class.
-Bring in any material that supports your animation idea.  It could be the audio, video, or animation reference.  Like I said you could surf FrameXFrame for ideas, or bring in a video of a dancer for reference.
-Remember to pick an idea that really engages you!  It will make it that much more fun to work on!


Wednesday, October 19, 2016

Class 09 10/18/2016

During the last class I showed you in more detail how I go about splining your animation from blocking.

One animation I showed to you that really demonstrated eye movement and facial expressions was called "One More Beer!"


One More Beer! from pedro conti on Vimeo.

Homework

Please begin splining your lip synch animation.  What I want to see if movement in the head, neck, and/or chest that adds to the animation.  Really make sure your movements support the dialogue that is coming out of the character's mouth.  Just moving lips won't do.

Thursday, October 13, 2016

Class 08 10/11/2016

Last class we I showed you how I would spline our head turns, and initial blocking of the lip synch.

What I forgot to mention is that this is the Midterm!  This really snuck up on us.  Time flies!

Lip Synch Steps to remember.
  1. -Have audio in .wav format
  2. -Import audio into your shot.
  3. -I usually like to have my timeline set at 4x height.  You can do this in preferences.

Here is a link to see how other animators approach their workflow.  Please look at these and try to keep in mind how you can use different processes for your own work.
An animation playlist about the workflow processes to get inspired.


Here is the drawing reference that I showed in class a few times. Flickr drawing references.

Here are some other videos to watch to see how people animate talking and acting.


I won't post anything about AE since you already have the audio file, and I will be opening AE again in class.  If you are curious to know more about AE, then please google it.


Homework


-Spline and finish your head turns

-Begin blocking out you lip synch
  1. -Film youself saying the word.  Act it out.  Try different options.  Filming yourself is REQUIRED.
  2. -Optional: Sketch out your ideas as well, similar to the pixar images I linked earlier.
  3. -Using stepped keyframes, block out your character animation.
  4. -Don't be afraid to think about what the character is doing before and after they "Ok"

Wednesday, October 5, 2016

Class 07 10/05/2016

Head Turn Animation

Hello everyone!  

Here are some helpful references on the topic of head turning.  Hopefully these will reiterate what I went over in class, and you can use these as helpful reference for when you are doing your homework assignment.


Please take note, there are many different ways to do a head turn.  A neutral head turn is completely valid, but whatever the emotion of the character might be would also affect how the turn is happening.  For instance, my animation that i worked on in class the other day was of a scared man.  He turned his head quickly, looking around to make sure nothing will hurt him.  If someone is relaxed, they might turn their head more slowly.  


aTools
I used the tween function of aTools quite a bit.  I hope you guys will continue to use it and become familiar with powerful a tool it can be.  As a reminder, here is the youtube video demonstrating aTools and how you can use it:


Review of Morpheus Face Rig
Please watch this video if you need any reviewing for the face rig on Morpheus.  Start at 14:30 to begin right at the face.

HOMEWORK

Based on what was shown in class, and the reference I provided in this blog post, please create your own head turn.  This is your chance to get creative.  Don't just rotate the head and blink the eyes.  Make me feel the turn in the body and the shoulders.  Create an expressive face that might communicate what your character might be feeling on the inside.  Please feel free to explore and experiment.  Remember you are creating art.  Let's see some emotion!

Don't forget to create a new perspective camera to view our animation with.  I usually rename it "RenderCam" which is what many studios do.  Find a good place for this camera, and lock it in place by locking attributes, or just keyframe it.  Make sure this camera view is the best angle for viewing your work.  Remember what I said about the eyes.  Our animations will work much better when we see both eyes in the shot.  Use your RenderCam to figure that out.

Please record yourself a few times turning your head and looking.  This is required!  Turn it in with your animation progress!

So in summary I want to see:
1 blocked animation of a head turn.
1 video of your filmed reference.