Topics covered in class:
-Animating a walk cycle in place.
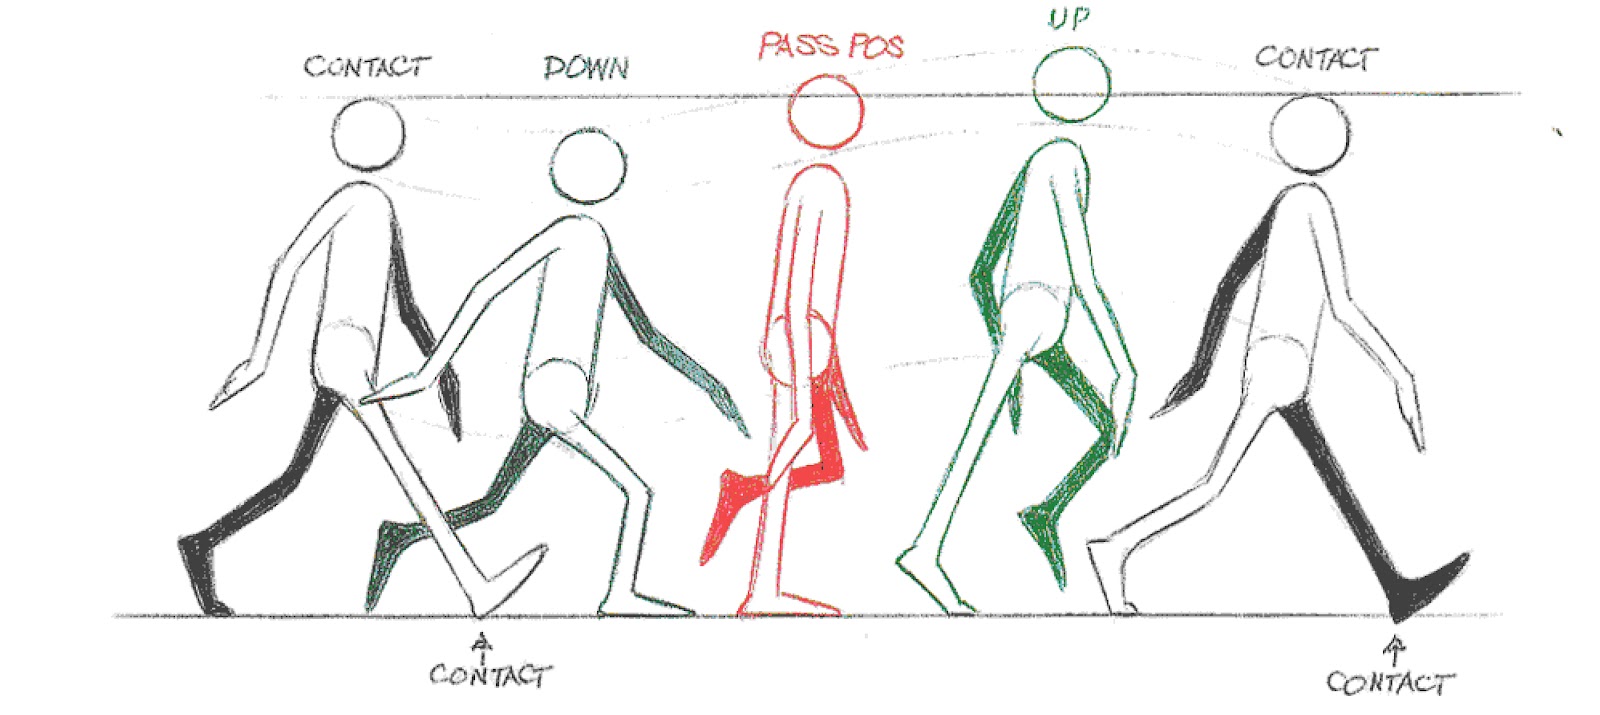
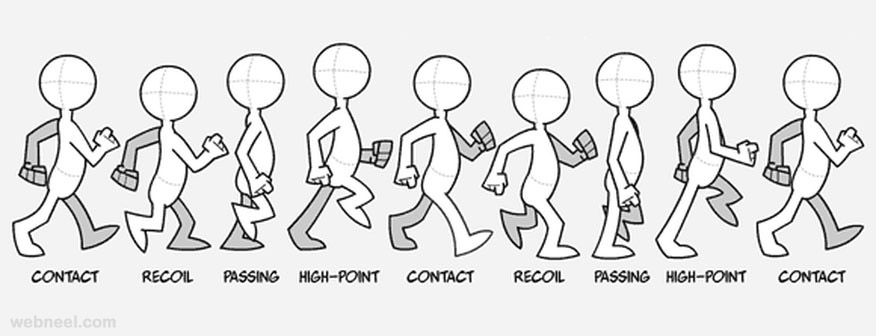
-Posing key poses for walk cycle using the animators survival guide as reference.
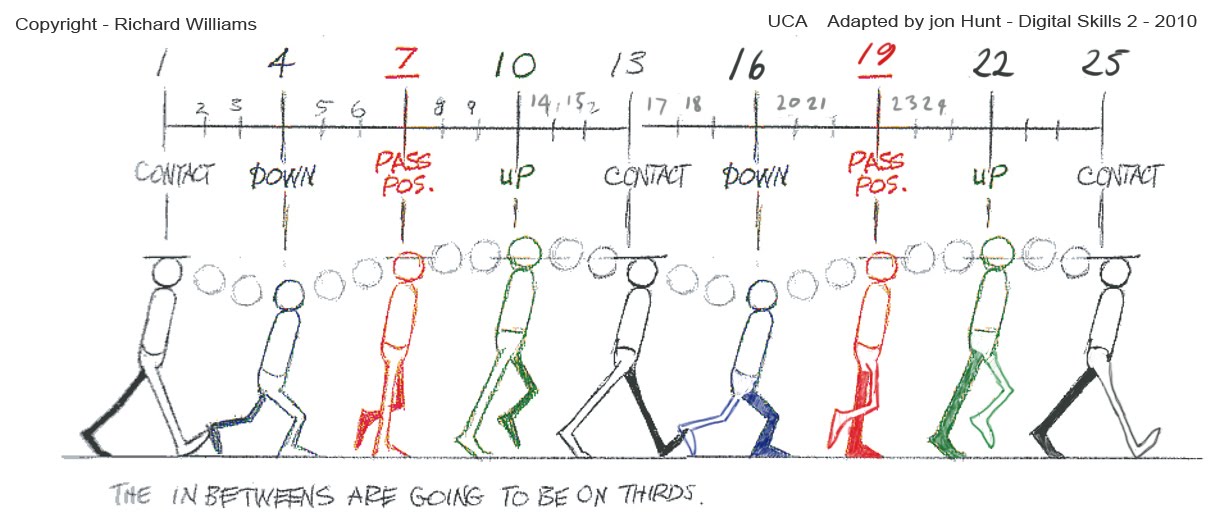
Adding break down poses in between the key poses.
Spacing the key frames of the poses so that the timing works right.
-Mechanics
Feet alternate opposite the arms. Example is when right foot is forward, left foot is back
Hips and shoulders have opposing rotations.
Torso moves up and down.
When animating feet, use heel and ball roll channels to move foot on appropriate pivots.
Animate torso, chest and head to feel the weight of the body moving up and down.
After animating the shoulder rotate on your FK arms, you can add animating to the elbows and wrists. Offset set each from each other to obtain a nice staggered motion. Order of animation would be Shoulders>Elbows>Wrists.
-Setting timeline so that your last frame isn't rendered when playblasting. The last and first frame will be the same and you dont want that frame playing twice when you are looping.
-Cycling Animation in Graph Editor.
Have infinity turned on to preview the curve.
-Quick Select Sets
On Norman I set up a quick select set so you can select all Ctrl Curves even if some are hidden.
Right click on Quick Select Set in Outliner and choose "Select Set Members".
-Tweening in aTools
Atools for maya at home (click to save)
Tutorial Video on aTools:
A NEW NORMAN!

In regards to the Norman Rig, I've created a new version of Norman with Quick Select Sets. I've also added Shader CTRLS which you can use to color each part of the body. I hope it is easy to understand, but if not I will go into more detail next class. Each Shader Control corresponds to geometry on the body. Each Shader Control has channels for R, G, B, and Shiny. If you are familiar with how RGB color works, you should be able to figure out how to use the values. 0=1 and 1=255 in the case of the controls I have created. I have already colored the arms and legs for you. Feel free to play with the values and see what colors you can get. The channel for Shiny should be self explanatory. You can add highlights or take them away. Again, this is not crucial for you first pass of the walk cycle. I can explain the setup for next class. I will email this rig to you.
Walk cycle images:

This man here is an inspiration. This person was not an animator before, but he decided he wanted to try it. Everyday for 100 days, he tried to animate a walk cycle. You can see him getting better and better with each try.
Other Walk Cycles:
Other Tutorials:
Felix Sputnick's animation videos, which are very insightful
Eadweard Muybridge, the photographer who studied motion.
Homework!
Please put together a first pass of your walk cycles. Don't forget to use aTools to save time. Use the images provided if you need references for which poses you would like to have in your walk cycle. Please work on your poses and timing until you feel like they look like good walk cycles.
I forgot to mention in class, I would like you also to film yourself walking. Use this as reference, but also to think about how each part of the body moves. This is required.
For next class I would like to see a quicktime of your walk cycles and your references if you have them. Please playblast them and email them to me before class begins. We will then take those and I will show you how to take them a step further and refine them.
If you need help or advice, please send me an email!
Also please don't forget to send me your updated ball bounces by at least next class!
No comments:
Post a Comment