Friday, September 13, 2019

Studio Arts Maya 101 Class 6 9/11/2019

Animating a ball bounce
In class I did a demonstration for how to do a ball bounce without squash and stretch.  Here are the steps I took:

1) Grab my ball and set key frames on translate Y for the highest and lowest point of my bounce over the timeline.  I use S to set keyframes.
2) In the graph editor, I can use ctrl-C and ctrl-V to copy and paste keyframes in Translate Y to add more bounces.
4)  I use broken and linear tangents on the keyframes where the ball hits the ground, to simulate accelerationg into and out of the floor impact.
5)  Once my up and down animatione feels good, I set keys for the translate and rotation of the ball as it is bouncing.  Usually the beginning of these curves should be linear, so they ball has motion at the beginning, and flat at the end, so it slowly stops translating and rotating.


Rigging with Constraints
I demonstrated a basic concept of rigging, where we use control curves to move poly object.  We set our keyframes on these control curves.   I usually use a parent and scale constrain to connect the control to the object.  I use these constraints, so I can keep Geo and Rig groups separate.  This is good practice for rigging.

Rigging with Joints and IK
After the ball bounce, I showed off some rigging concepts.  I used a joint chain on a leg mesh to show how it deforms the shape by pulling components.  After that I demonstrated how to setup and use an IK Handle.


Rigging a Knee

Norman Character Rig
Lastly, at the end of the class, I showed an example of a character rig and how I pose and animate it.  For class I used the Norman Rig.


A Norman Walk Cycle


and here is a fun video of Norman
animation tutorial part. 1 AKA "the secret of animation" from giovanni braggio on Vimeo.

If you would like to mess with some character acting, go hang out at the 11 Second Club.  There you will find monthly animation competitions, based on the selected audio clip.

At the end of the day, I hope you get from this lesson how animating in Maya would work.  I realize rigging and skinning are very advanced concepts, so I don't expect you guys to be master riggers after this class.  I just want you to know the rigging concepts before you play with a Maya rig.  There are so many free rigs on the internet, it is very easy to grab one and just start animating.  This is what I would suggest for people who are interested in becoming maya animators.

Thursday, September 5, 2019

Studio Arts Maya 101 Class 5 9/4/2019

Hello guys.  Here are some reference videos for modeling a face.  Each one of these works a little differently from what I showed you.  Check them out and see if it is something you would be interested in trying!  The great thing about Maya and CG is that there are multiple viable solutions to the same problem.  You just need to find out what works for you.


This one is a 3 part series:
Part 1 
Part 2
Part 3


Animation 

Towards the end of the class I began to show you key frame animation.  This is where I used the s key to set markers on the timeline, that represented certain property or channel values.  The change of values over time is interpolated by Maya.  Through a series of keyframes, we can create animated movement in Maya.


BONUS

Here is the Spiderman Animation video I showed in class.  This is pretty advanced stuff, but super interesting.


Thursday, August 29, 2019

Studio Arts Maya 101 Class 4 8/28/2019

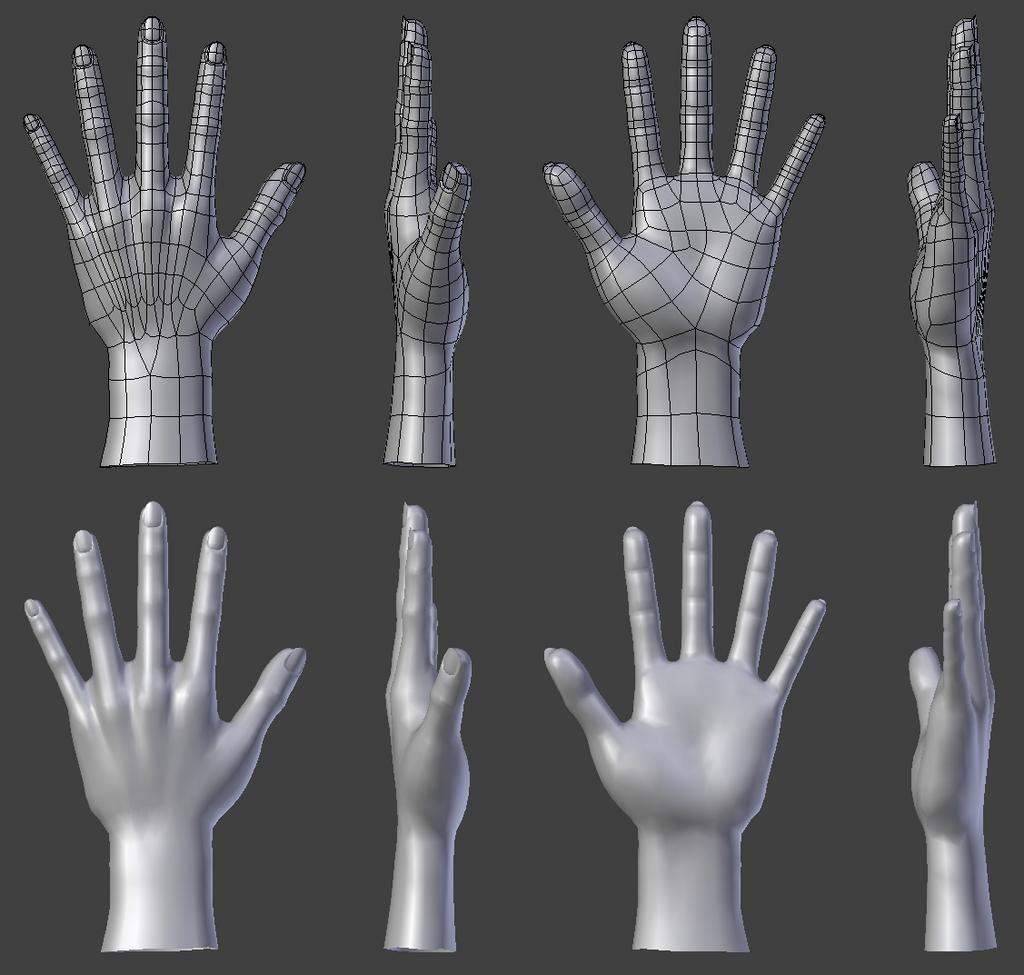
Hi Class!  Here you will find some other reference material for modeling a hand.  You might notice some people do it differently than what I've shown you, which is ok.  The point is to get familiar with the tools made available to you in Maya.  Perhaps you will find a method that will work for you!  Please explore these tutorial videos to get a sense for how other artist tackle the same problem.  Like I've said, there is a wealth of knowledge out there!


Part 1:
Part 2:


Topology Reference:


Thursday, August 22, 2019

Studio Arts Maya 101 Class 3 8/22/2019

During the last class I did an explanation of Polys/Nurbs (SPOILER ALERT: nobody uses nurbs anymore)

POLYGONS

NURBS

-The only nurbs we use are curves. More on that later!

Polygon Component Mode

-Face, vertex, edge, are the main ones used for modeling.

Google any of these terms and you will find a youtube video demonstrating them.

Modeling Tools
-Modeling Toolkit has many of these tools.

Extrude
-Use to extrude polygons from a selected face or edge. 
-Remember that the extrusion comes with a local manipulator that allows you to move it locally from it's origin. The world manipulator may not be as helpful. 
-Selecting a face, and moving it while holding SHIFT can extrude, but it can cause issues, so it's best not to use it this way.
-Used to insert an entire edge loop onto an object.  Great for quickly adding spans if you need more topology for modeling.

Multicut Tool
-Used to manually split polys on an object.

Append Poly
-Used to bridge gaps with new polygons.
-Select one edge first, and then the tool will highlight available edges to build onto.

Bevel
-Used to soften corners or edge with added geometry.

Booleans
-Use these operations to create a new shape based on the intersecting input shapes.
-The three operations are Intersection, Union, and Difference.
-Selection order affects the shape that is created.  For example, if you want to punch a hole through a cube using a cylinder, you would select the cube first and the cylinder second.

Deformers
-Lattice deformer builds a cage around a mesh that you can manipulate in component mode.  This allows you to modify your mesh in broad strokes.
-Non Linear Deformers are used to create different deform effects like bend, twist, squash, etc.

Combine
-Used to combine two separate meshes into one mesh.
-This allows for them to be connected together using polygon modeling tools.
-Used to separate selected faces from an object, resulting in 2 separate objects.

Merge
-Used to merge or weld vertices or edges to each other. 

Normals
-Hard/soft changes the way polys are displayed in maya.  Softened edges are harder to see, while harder edges clearly define the polys.  Sometimes you may need to toggle this when you are modeling when edges are hard to distinguish.
-Reversed Normals, appearing black, makes it's hard to see your mesh.  Sometime this can happen with a bad extrusion, or in other situations.  To fix, just select the face and reverse those normals.
Create Poly
-Tool that allows you to draw vertices to create a polygon.

Nurbs Curves
-Nurbs curves can be useful tools to assist in modeling.
-Allows you to layout CVs (like vertices for nurbs) to create a curve.

Open/Close Curve
-Helps you close an open curve.

Created Meshes from Curve

-IMPORTANT NOTE:  By default these tools create Nurbs surfaces.  I dislike nurbs as you might know, so I like to set the options for these to creat Polygons as Quads, with Count.  Play with the number for Count to see how much is right for you.
HOMEWORK
With object manipulation, grouping, and modeling tools, make any kind of furniture you like!

Thursday, August 15, 2019

Studio Arts Maya 101 Class 2 8/14/2019

Creating Shapes
Shape options are in the option menu, but also in the shape history under the channel editor.
Translate Rotate and Scale
W is translate
E is rotate
R is scale
Tool options
Moving in Object and World Space
Manipulating a Camera
Moves just like a maya object.
Camera Settings
Clipping Plane changes how far and how close the camera will render an object.  Can be used to fix glitchy geometry
Focal Length is used to change how much perspective the camera shows.  High number flattens the camera’s view, while a low number exaggerates the perspective.
Selection Masks
Disable or enable what is selectable in the Viewport window
Hide/show for visibilty
Ctrl + H to hide
Shift + H to show again
Touch on Hypergraph
Hierarchies
Manipulator + -
Make the manipulator physically larger or smaller.  Larger manipulator makes it easy to have precision.
Channel editor
Select a channel and middle mouse drag to change the values.
Math can be done inside the channel box.
+=, -=, *=, /=
Changing pivot
Insert(Pc)/Home(Mac) to enable change pivot mode.
Alternative is to hold “D” to move the pivot.
Modify>Center Pivot to bring it back to the center of the object or group.
Point and grid snap
Hold x to grid snap, and v to point snap.  To keep these turned on you can press the button at the top of maya.
Groups/locators
Same object essentially.  Locators are groups that can be grabbed in the viewport.  If you delete the shape node of the locator, it becomes a grou null.
Use these to organize objects in the outliner or in a hierarchy.
Freeze transformation
Zero’s out all transform values.
Parenting and Grouping methods/hotkeys
p to parent.
Shift p to unparent
Ctrl g to group
In the outliner you can select object and middle mouse drag them into another object or group, making it a child.
Organize your Outliner!
Groups objects and keep your outliner organized in case someone else needs to open your file.


Assignment:
Please use what you have learned about navigating Maya, and the manipulator tools in class to build anything you like.  The point of this project is to have fun and become familiar with the fundamentals of moving and organizing objects in Maya.  I will not be checking these, but if you would like to share with the class please place them in your student folders on the server.


Thursday, August 8, 2019

Studio Arts Maya 101 Class 1 8/7/2019

Hello Class!  Here is a small overview of the topics I covered in yesterday's class.

Maya Menus

  1. Options - The little square next to each tool allows deeper customization options for whatever you are using. Most menu windows have a help page specific to which ever tool you are opening.
  2. Shelves - most used maya functions layed out for quick access, but no access to the options. Options can sometimes be accessed if you have the tool editor opened.

Left tool Window
  1. No tool Q, Translate W, Rotate E, Scale R.
  2. Different maya viewport options below that.

Right Window
  1. Channel Box - Info on X,Y,Z values for translate, rotate and scale.
  2. Attribute Editor - Under the hood info on whichever object you have selected.
  3. Tool Editor - Setting for currently active tool.
Timeline - used for animation. Will go more in depth later in the course.

Viewport Panel options - 
  1. Adjust what you see in your view port work area
  2. 4 for wireframe, 5 for smooth shaded, 6 for textures, 7 for lights.
  3. Spacebar used to switch between different camera views
Other Windows
  1. Outliner- Keeps track of all objects in your scene and their hierarchies.
  2. Hypershade - Workspace for shaders
  3. Graph Editor - Workspace for animation


Project Window, and Setting a Project Window - used to set up your maya project folders, and connect Maya to that structure for fast referencing, and file access.


Here is a great video talking about what I showed you last night, plus some extra stuff I may not have covered.

Thursday, December 7, 2017

BFA 3D Animation Class 13 12/07/2017

Head Turn Animation

Hello everyone!  

Topics cover in class:

One important point I wanted to impress upon you is to make sure and keep both eyes on the screen facing the camera.  The eyes are important for emotional connections.  If we lose an eye we might lose that connection.

For the demonstration, I blocked out key poses for a head turn animation, and added a change of emotion at the end.  You can see my key poses in the maya scene I have sent to you.  My poses are by no means an exact blue print.  I think it was sufficient to get my idea across.  You may need more or less depending on what you decide to do.  This is why using reference video will be very useful for this exercise.

I also made sure to take care when posing facial expressions.  I wanted to keep them interesting and asymmetrical.  This might mean opening one eye more than the other, offsetting the mouth from the center, or changing the eye brow shapes.

Here is Carlos Baena's article about eye brows.

Here is Carlos Baena's article about eye blinking.


Here are some helpful references on the topic of head turning.  Hopefully these will reiterate what I went over in class, and you can use these as helpful reference for when you are doing your homework assignment.

________________________________________

**IF THERE IS ONE VIDEO I WANT YOU TO WATCH IT IS THIS ONE, WHERE AN ANIMATOR SHOWS YOU HOW HE BLOCKS OUT HIS HEAD TURN.**  Sorry for the caps lock and the yelling.  I just wanted to make sure you read this <3.

<3<3<3<3<3<3
____________________________________

Please take note, there are many different ways to do a head turn.  A neutral head turn is completely valid, but whatever the emotion of the character might be would also affect how the turn is happening.  


Other videos we watched in class:


Chuck Jones - The Evolution of an Artist from Tony Zhou on Vimeo.
Analysis of legendary animation director Chuck Jones and how he approached developing characters.  Because he set down rules and very defined personalities, he was able to effectively create vivid believable characters.  He has also mastered the art of communicating comedy and character through limited facial expression.


One More Beer! from pedro conti on Vimeo.

Great character animation that tells a story and shows you who the character is just by using the eyes.


Mother (2009) - Telephoto Profile Shots from Tony Zhou on Vimeo.


Analysis of a great Korean film director who broke the rules of showing both eyes in order for the audience to feel disconnected and helpless while watching the characters.


Since animation is acting, much of what Micheal Caine is talking about here is relevant to what we do as animators.


HOMEWORK

Based on what was shown in class, and the reference I provided in this blog post, please create your own head turn.  

Don't forget to create a new perspective camera to view our animation with.  I usually rename it "RenderCam" which is what many studios do.  Find a good place for this camera, and lock it in place by locking attributes, or just keyframe it.  Make sure this camera view is the best angle for viewing your work.  Remember what I said about the eyes.  Our animations will work much better when we see both eyes in the shot.  Use your RenderCam to figure that out.

I forgot to mention this in class, but I would like to REQUIRE you to record yourself a  turning your head and looking.  Do it a few times and pick the best one.  Turn it in with your animation progress!

Think back to your assignment when you posed out the character to your drawings.  You are essentially doing the same thing, but with poses that are sequential.

So in summary I want to see:
1 blocked animation of a head turn.
1 video of your filmed reference.